I was so excited to be attending the Introduction to silver clay class, I love learning new stuff.
The class was taking place at Burton Manor in Burton on the Wirral over three days, and as I've mentioned Tracey Spurgin was our tutor.
These classes start in the evening usually from 8pm - 9.30pm. the first evening, because meals are included in the course fee students arrive early, it seemed a weird time to be starting a course, I couldn't understand why it couldn't be condensed into two days but as the course progressed I understood why.
During the evening meal all the students and tutor get to know each other, what a great ice-breaker! and by the way the food is excellent.
After dinner we all went into class and made a start on shaping the cork clay to make the core for one of the projects, as cork clay takes a while to dry out and it has to be thoroughly dry before firing.
We were given the clay and findings all the ingredients we needed for our creations, each of us had a basket of tools on the table, Tracey talked us through what we would be doing on the course, then off we went home, looking forward to the next two days.
These are what I made


The heart was made using the cork clay as a form, using the syringe type clay, this is slightly thinner clay which is bought already in the syringe and this can them be piped out like you would decorate a cake.
I had to measure my finger using a ring measure, and because the clay shrinks while it is being fired the ring has to be made three sizes bigger.
Once made, it is dried on the ring mandrel, then it is refined by sanding, (a lot of sanding) filling in any flaws and dints with the syringe clay, drying again, sanding again until it is smooth and flawless (as they say, 80% of the work on the piece needs to be done at this the dry stage) then decorating it using the syringe clay.
The earrings, after choosing the style and shape after drying and sanding, they are fired and we were shown how to achieve a mirror finish by polishing using sanding sponges and papers, I didn't get that high finish required on these earrings, but having been put through the tumbler they ended up with a fairly respectable shine.
We then added the resin, this resin is cured using a UV light, brilliant! all sorts of things can be added to the resin before it is cured - glitter, micro. beads, it can be tinted any colour, there are specialist resin tints but acrylic paints work just as well.
The pendant was textured using a texture mat, we had loads of mats to choose from, loads of cutters and template shapes, how I ended up with this boring shape I just don't know, hence the heart stuck on it, even that fell off and Tracey soldered it back on, brill... I needed a lesson on soldering.
The leaf pendant was made using silver clay paste, certain leaves, ones with a good veining not hairy or waxy, make a good template.
The paste is stippled onto the back of the leaf in layers, drying the paste in between each layer, when the layers are thick enough and thoroughly dry the leaf is refined, edges sanded, then it is fired.
The best thing about these courses is that you learn so much more than how to make these particular items, there are so many tips learned not just from the tutor but from the other students, who by the way were a great group, very knowledgeable in lots of areas quite a few were silversmiths or had a background in jewellery making, and they were very generous with their knowledge.
Before I came home I had signed on to the advanced course being held in the August.
5 months to go I couldn't wait...


 After soldering, (as you can see by these pics, was successful)


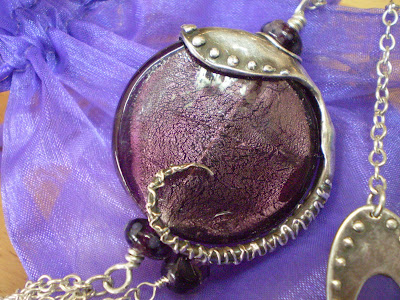 I must admit even I find this brooch a bit strange!


